How to publish a website (cheap)

You want to host a simple website that displays information about you or your next cool project or your company. You don't want to spend a lot of money on it. This guide is for you.
Vocabulary
A domain is what people have to type in their web browsers to see your site.
When you create a website, it's made up of files, images, and other content, and these need a place to reside. The service that stores them and serves them to visitors is hosting your website.
We'll use INWX and GitHub
Throughout the guide I will refer to my own site www.felixzieger.de as an example.
We'll use those three services:
- INWX https://www.inwx.de (register your domain)
- GitHub https://github.com (host your website)
- goneo https://www.goneo.de (optional, for emails)
All of those can be switched out since they offer standardised services.
Step 1: Register a domain with INWX
- Sign Up with INWX: The first step in hosting your website is to choose and register a domain name with a domain registrar like INWX. Sign up for an account on their website.
- Search and Select a Domain: Use INWX's domain search tool to find an available domain name that suits your website. Once you've found the perfect name, add it to your cart and proceed to checkout.
- Complete the Registration: Follow the prompts to complete the domain registration process. You'll need to provide your contact information and choose the desired domain extension (e.g., .com, .org). Make sure to review and confirm your purchase.
- Leave the tab open: After registering your domain leave the INWX tab open. We'll need it at the end of Step 2 to point your domain's DNS records to GitHub's servers.
Step 2: Host your website with GitHub pages
Official documentation: https://pages.github.com/. Here is my tl;dr:
- Create a GitHub Account: Sign up for a free GitHub account. We'll need your username in step 2, so note it down.
My username on GitHub is felixzieger.
- Create a New Repository: In your GitHub account, create a new public repository named $username.github.io.
In my case this is felixzieger.github.io.
- Upload Your Website Files: Upload a simple HTML file called index.html to the repository. This is mostly to test out if things work for now and can be adopted later. (Here is https://github.com/felixzieger/felixzieger.github.io)
If you have no idea how to come up with one, ask ChatGPT to write one for you.
Example prompt: Hey, I want a simple webpage written in HTML and CSS about myself. My name is Felix and my blog lives under blog.felixzieger.de and my linkedin is linkedin.com/in/felixzieger
- Enable GitHub Pages: Go to your repository's settings, and under the "GitHub Pages" section, select the main branch. GitHub will now host your website at a URL like username.github.io.
Like this: https://felixzieger.github.io/
- Set Up Custom Domain in GitHub: To use your INWX-registered domain with your GitHub-hosted website, configure your GitHub Pages settings to use your domain name.

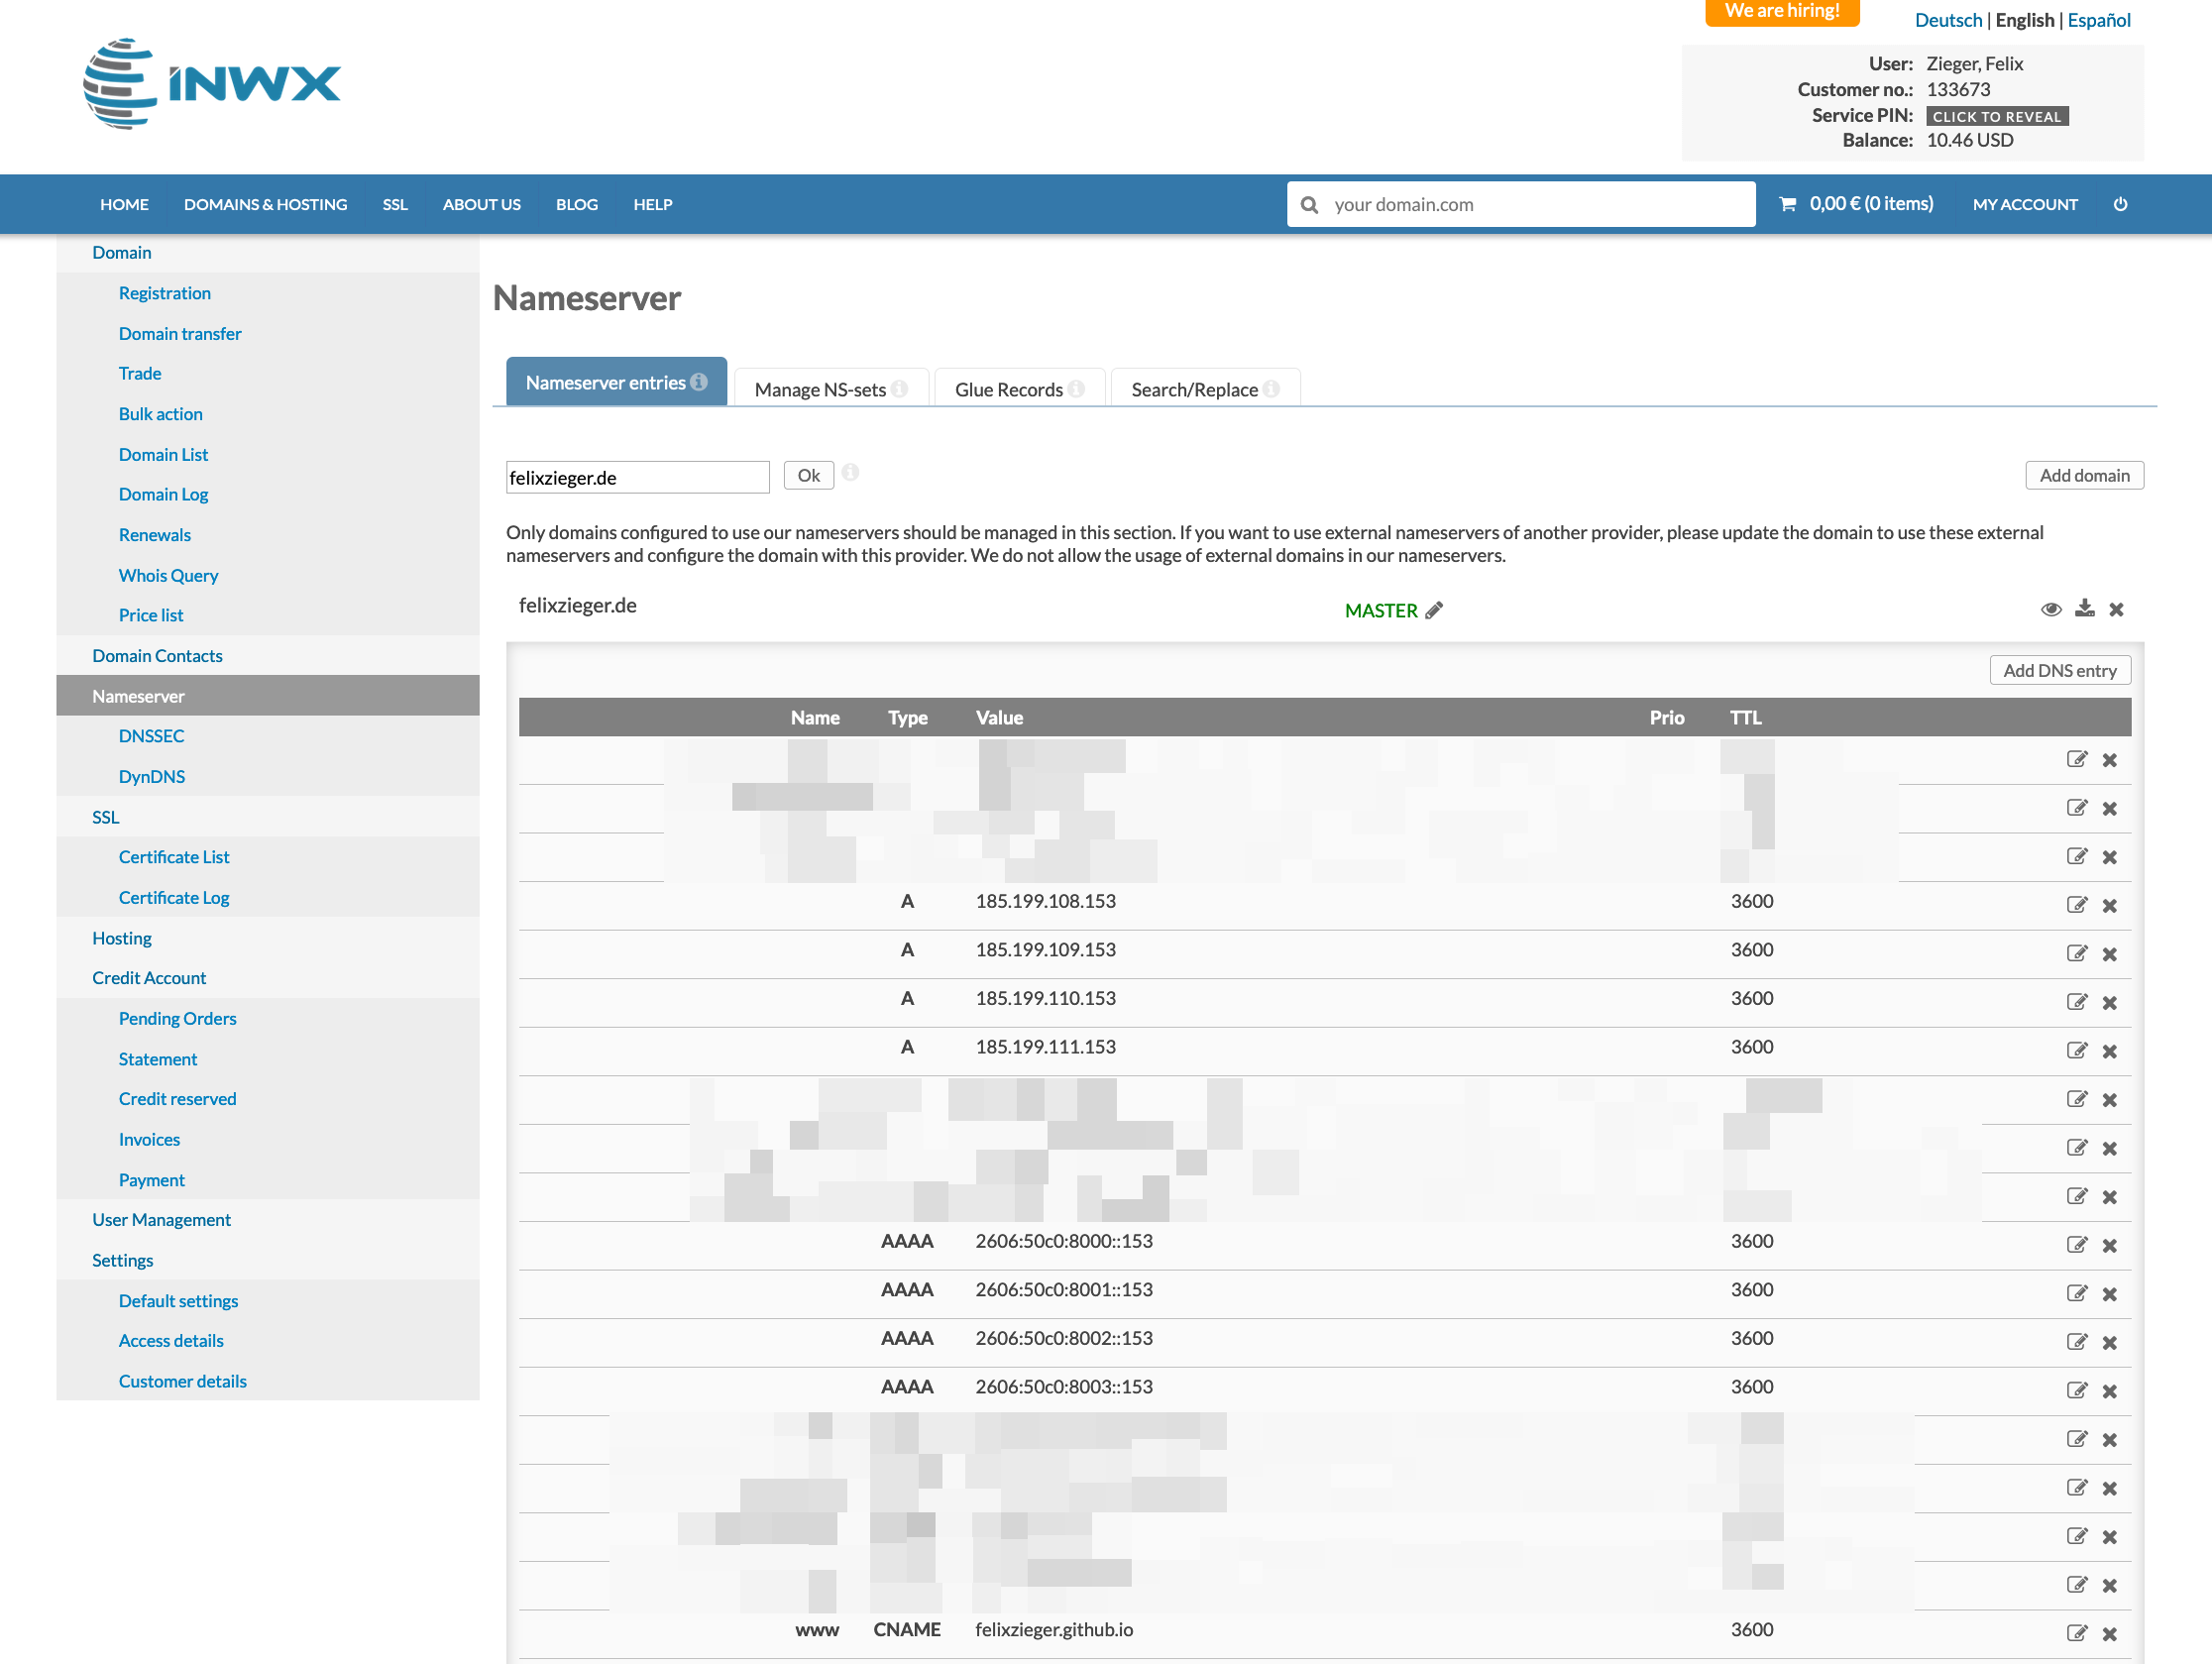
- Set Up Custom Domain in GitHub: Update your DNS records on INWX as shown in the picture below.

Optional Step 3: Set up email with Goneo
- Create a Goneo Account: Sign up for a Goneo email hosting account, which will allow you to set up custom email addresses using your domain.
- Verify Domain Ownership: Follow Goneo's instructions to verify your ownership of the domain registered with INWX. This process usually involves adding specific DNS records provided by Goneo to your domain settings in INWX.
- Create Custom Email Addresses: With your domain verified, you can now create custom email addresses (e.g., yourname@yourdomain.com) using Goneo's control panel.
- Configure Email Clients: Set up your preferred email client (e.g., Outlook, Thunderbird) to connect to your custom email addresses hosted by Goneo. Goneo will provide you with the necessary email server settings for configuration.
I hope this guide will save at least one person from managed wordpress.
Let me know what you think about it!
